SPA Quick Start
This guide will walk you through integrating with your Single Page Application. It will assume you want to use the sensible defaults that saascannon initializes with, you can always go back and tweak these later.
At the end of this guide you will be able to login to your SPA, implement conditional access in both your frontend and API, and allow users to signup to plans using Stripe (opens in a new tab).
Prerequisites
Before starting, you will need a Saascannon tenant, if you have not already you will need to create a saascannon tenant.
Configure your application
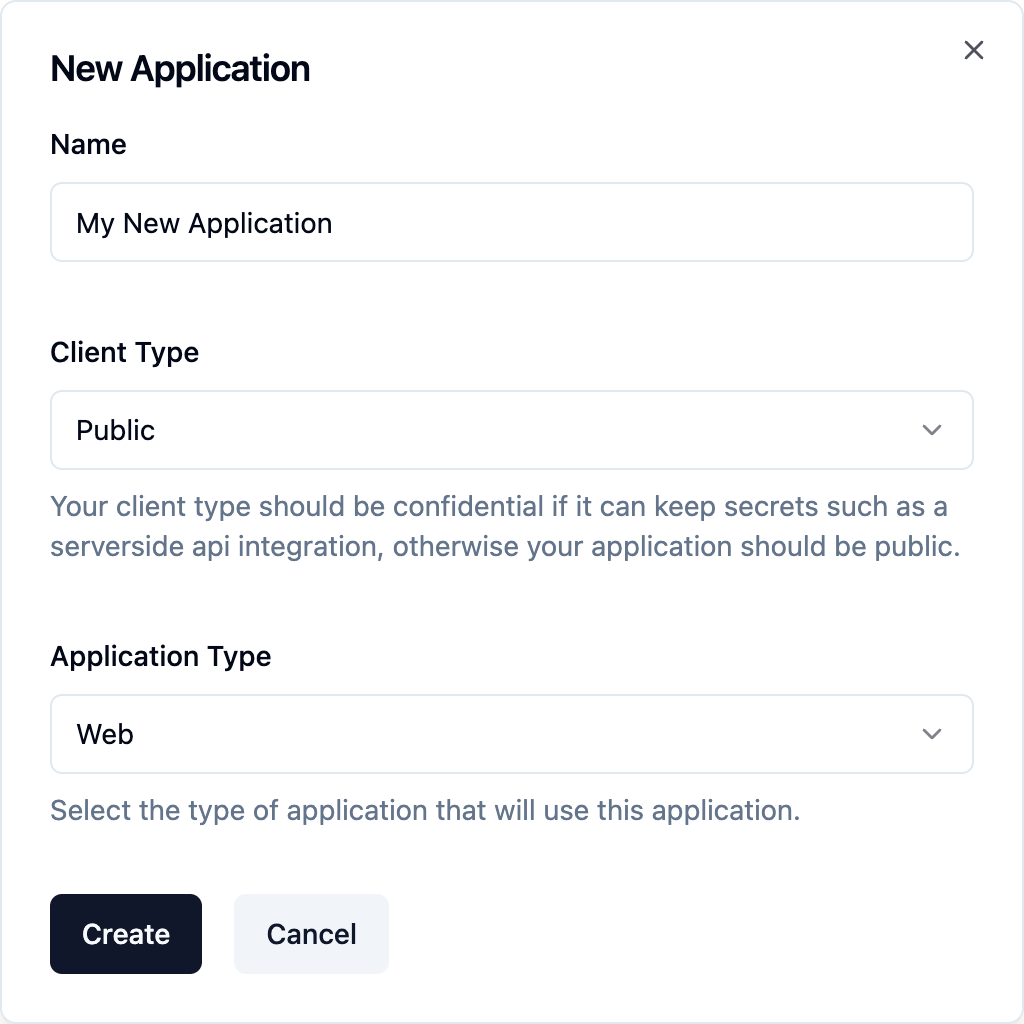
To allow users to signup and login, you will need to create an application at dash.saascannon.com/applications (opens in a new tab) which represents the application that you are building. For SPA applications, you will need to configure the client with a Public client type and a Web application type.
Once you have created your application, you will need to configure a few options, however, you are free to tune your application settings as much as you like to your own needs.
- Setup your redirect url (this needs to be a reachable page url where javascript can run on the client)
- Set your application to first party (optional)
Install and configure the Saascannon SPA SDK
Install
npm i @saascannon/spaConfigure
Navigate to the overview tab for your newly created application and look for the integrations card, select "SPA" and copy the configuration into your application.

Note: When importing and instantiating the saascannon spa client, it is important to ensure that it is loaded on all pages, it is best practice to put the above code in the main javascript entrypoint of your application.
For now you will likely want to add an afterCallback handler to redirect the user to your application's homepage once they have logged in.
import SaascannonSpaClient from "@saascannon/spa";

const saascannonConfig = {
    domain: "https://demo-app.uks-1.saascannon.app";
    clientId: "example-client-id-123";
    redirectUri: "https://example.com/saascannon-callback";
    afterCallback: () => router.push("/"),
}

const saascannon = new SaascannonSpaClient(saascannonConfig);
Integrate
At this point, you will be able to signup, login and logout to your app alongside allowing users to manage their account data.
// Login to the application
saascannon.loginViaRedirect();

// Signup to the application
saascannon.signupViaRedirect();

// Logout of the application
saascannon.logoutViaRedirect();

// Open the account settings modal
saascannon.accountManagement.openAccountSettingsModal();
You will likely want to bind these methods to run when buttons/links are pressed within your user interface, it is up to you to decide how to trigger these functions. A full list of functions and more details are available in the @saascannon/spa docs (opens in a new tab).
Integrating subscriptions
If you have not already, have a look around the saascannon dashboard (opens in a new tab) and configure it to your liking. For subscriptions, you will need to configure some plans, products and optionally plan groups. This will allow you to either assign plans to users via the saascannon dashboard (opens in a new tab) or programatically via the saascannon application api.
For subscriptions powered by Stripe (opens in a new tab), you will first need to setup your stripe account to work with Saascannon, create some prices in the stripe dashboard, then link them to products in the Saascannon dashboard. You will then be able to subscribe users to plans using the account management api.